
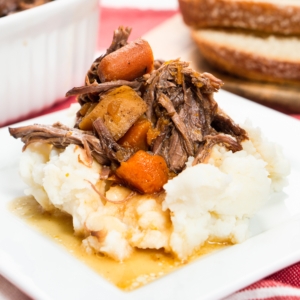
If you haven’t tried flan, you are missing out! It’s a delicious caramel glazed custard-like dessert traditional in many Hispanic countries including my own, Honduras. It is usually baked in a water bath, but now you’ll be able to easily make it in the Instant Pot!
This post contains affiliate links. For more information, see my disclosure.
Flan, It’s What’s for Dessert
I grew up on flan! In Honduras, it’s a very common dessert found in most restaurant menus. My mom used to make flan all the time, no special occasion needed! She would sometimes make it from scratch and she would sometimes buy the little, boxed packs, like pudding boxes that are easy to make.
My sister-in-law made all kinds of different flans, including the harder-to-make choco-flan which is a layered flan and chocolate cake dessert. I also have an easy and delicious recipe for Instant Pot Chocoflan you can try!

Another popular flan in Honduras is Flan de Coco (Coconut Flan). The flan infused with sweet coconut flavor is amazing. In this post, though, I will show you how to make a delicious Instant Pot Flan that I’ve been making in the oven for years. It’s not your regular jiggly flan, it’s a bit denser and creamier. It’s simply amazing!
Flan, Flan Everywhere
I can’t tell you how many times I had to make this flan in order to get the timing and ingredients just right for the Instant Pot! I had flan coming out of my ears! My neighbors were also recipients of plenty of flan during the trial and error period. They didn’t seem to mind!

I tried all kinds of different pans and ramekins and finally found the perfect flan pan. If you don’t have one you will be able to use any other pan that fits in your Instant Pot, and you will still get a delicious flan. Do not, however, use a pan that is not sealed, like a springform or push pan. Caramel and flan will leak out during cooking. I will say this, though, if you will be making flan often, I highly recommend you get one of the flan pans. I love mine!
Finally Perfect Instant Pot Flan
So after many tries, I finally achieved exactly what I wanted. This Instant Pot Flan is so easy to make and so crazy delicious, you will want to make it often!
Just a few simple steps and you’ll be enjoying some amazing Instant Pot Flan ….. Here we go!
Now it’s your turn to give this Instant Pot Flan recipe a try!
If you are an Instant Pot beginner, I have included a step-by-step below or you can jump straight to the recipe card.
Essential Items
Here are some essential prep tools, utensils, and appliances I used to make this recipe.
Featured Items
Here is a list of the products featured in this post or products similar to those featured in this post:
23 Must-Have Electric Pressure Cooker Accessories
Make sure to check out my Ultimate List of Electric Pressure Cooker Accessories! I’ve included everything you could ever need to help make your pressure cooking quicker, easier, and even more convenient.
How to Make Flan in the Instant Pot
You are really not going to believe how easy this Instant Pot Flan is to make. Just a few ingredients that you probably already have on hand and you’re good to go!
So, let’s get started making this wonderful Hispanic dessert.
Step 1: Gather the Flan Ingredients
Flan is made from just a few simple ingredients: eggs, evaporated milk, sweetened condensed milk, cream cheese and sugar for the caramel. That’s it!
The cream cheese in this flan is the special ingredient that makes it extra creamy and much denser than a traditional flan. I would describe the texture of this flan as falling somewhere between that of a traditional flan and a cheesecake.


Doubling This Recipe
If you’d like to make two flans, this recipe doubles perfectly. In fact, the original recipe I make in the oven is a doubled recipe. I had to half the recipe for the Instant Pot since the pans that fit in the pot are smaller.
So if you have a party and want to make two, just double the ingredients, and follow the rest of the recipe exactly. For the cooking portion, I would personally make them one at a time instead of cooking both in the pot at the same time.
See the recipe below for exact measurements.
Step 2: Gather the Essential Equipment
This recipe requires some specific equipment:
- Instant Pot: We, of course, will need an Instant Pot. I use my 8-quart pot, but a 6-quart will work for this recipe also.
- Trivet: To keep the flan pan off the bottom of the liner and sitting above the water, you’ll want to set it on a trivet.
- Blender: The eggs, evaporated milk, sweetened condensed milk, and cream cheese will need to be thoroughly blended. Any blender should work for this, but I love my Ninja blender.
- Non-Stick Fry Pan: When making the caramel, I use a non-stick frypan. I’ve tried other pans in the past, but a non-stick frypan makes it easier to transfer the hot caramel to the flan mold. Plus, clean up afterward is much easier as well. Now, I always use my 10-inch GreenPan when making the caramel.
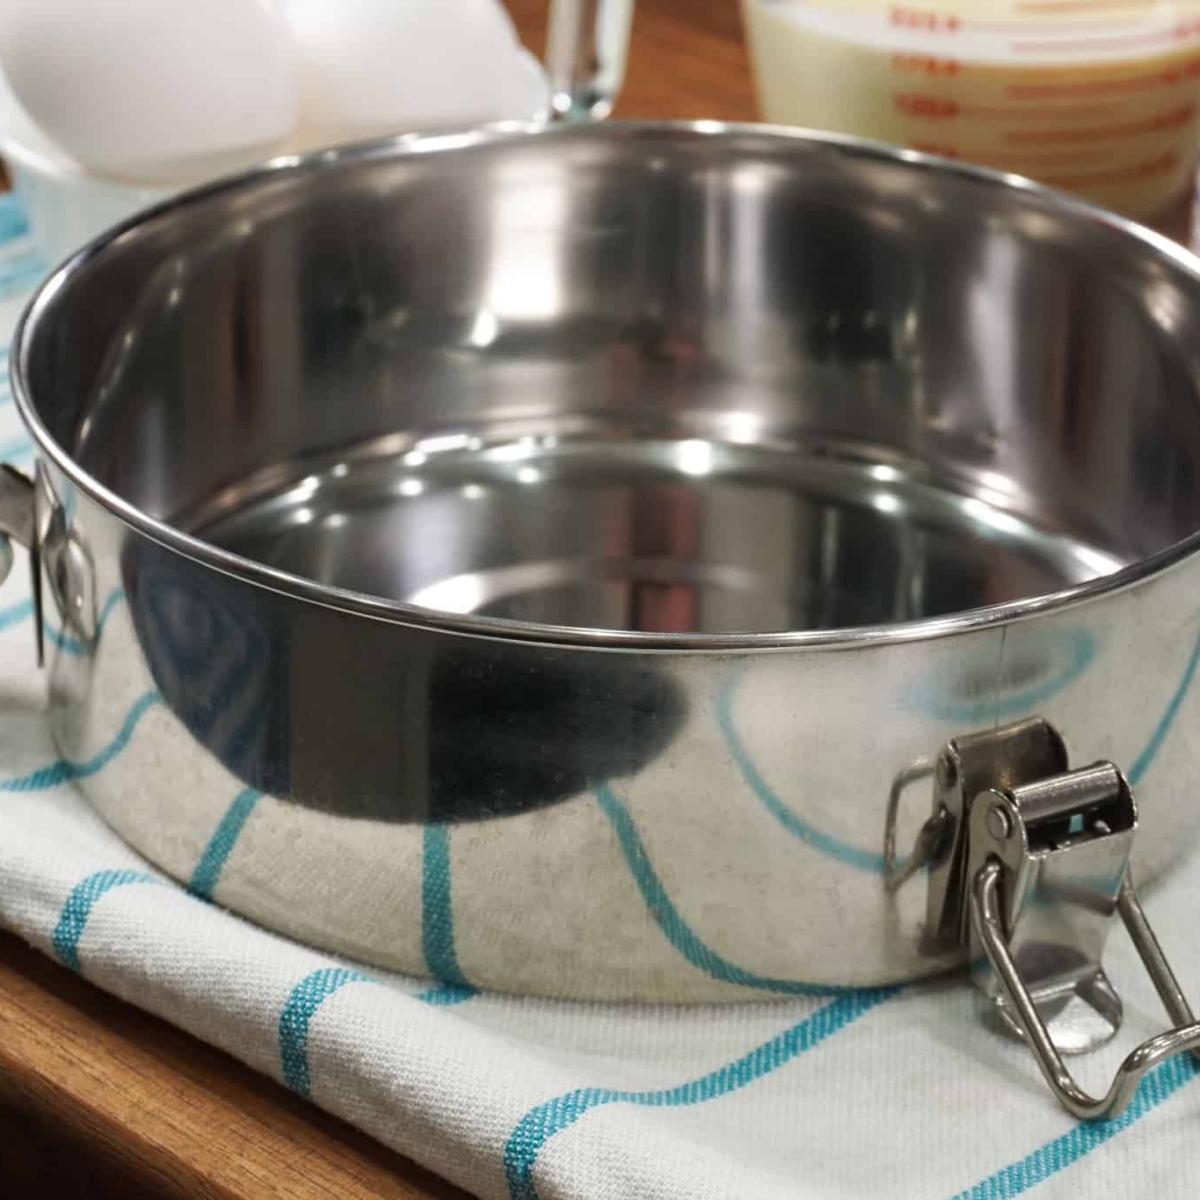
- Flan Pan: You can make flan in just about any pan in the Instant Pot as long as it fits in the pot and is covered tightly with foil. I have used bundt pans for making flans. The only exception would be a push pan. Definitely, do not use a push pan when making flan because the flan will leak out of the pan into the Instant Pot liner.
- Flan Mold: Flan molds are specially made for making flan in the Instant Pot. The mold below is the flan mold that I mentioned previously. It’s perfect for making flan and among everything I’ve tried, it was the best performing mold. I particularly like the fact that it has latches that keep the lid tightly secured to the mold.
Step 3: Making the Caramel
This is probably the hardest part of making flan – making the caramel. I must admit, I leave this task to my hubby Ryan since I have burnt one too many caramels on the stove! It really isn’t hard, you just can’t be distracted, and you have to focus on the caramel and the caramel ONLY.
Add the Sugar to the Pan
All you need is ½ cup of sugar. Pour the sugar into your pan on the stove and cook it on medium-high heat. You’ll want to mix it continuously while it is cooking.

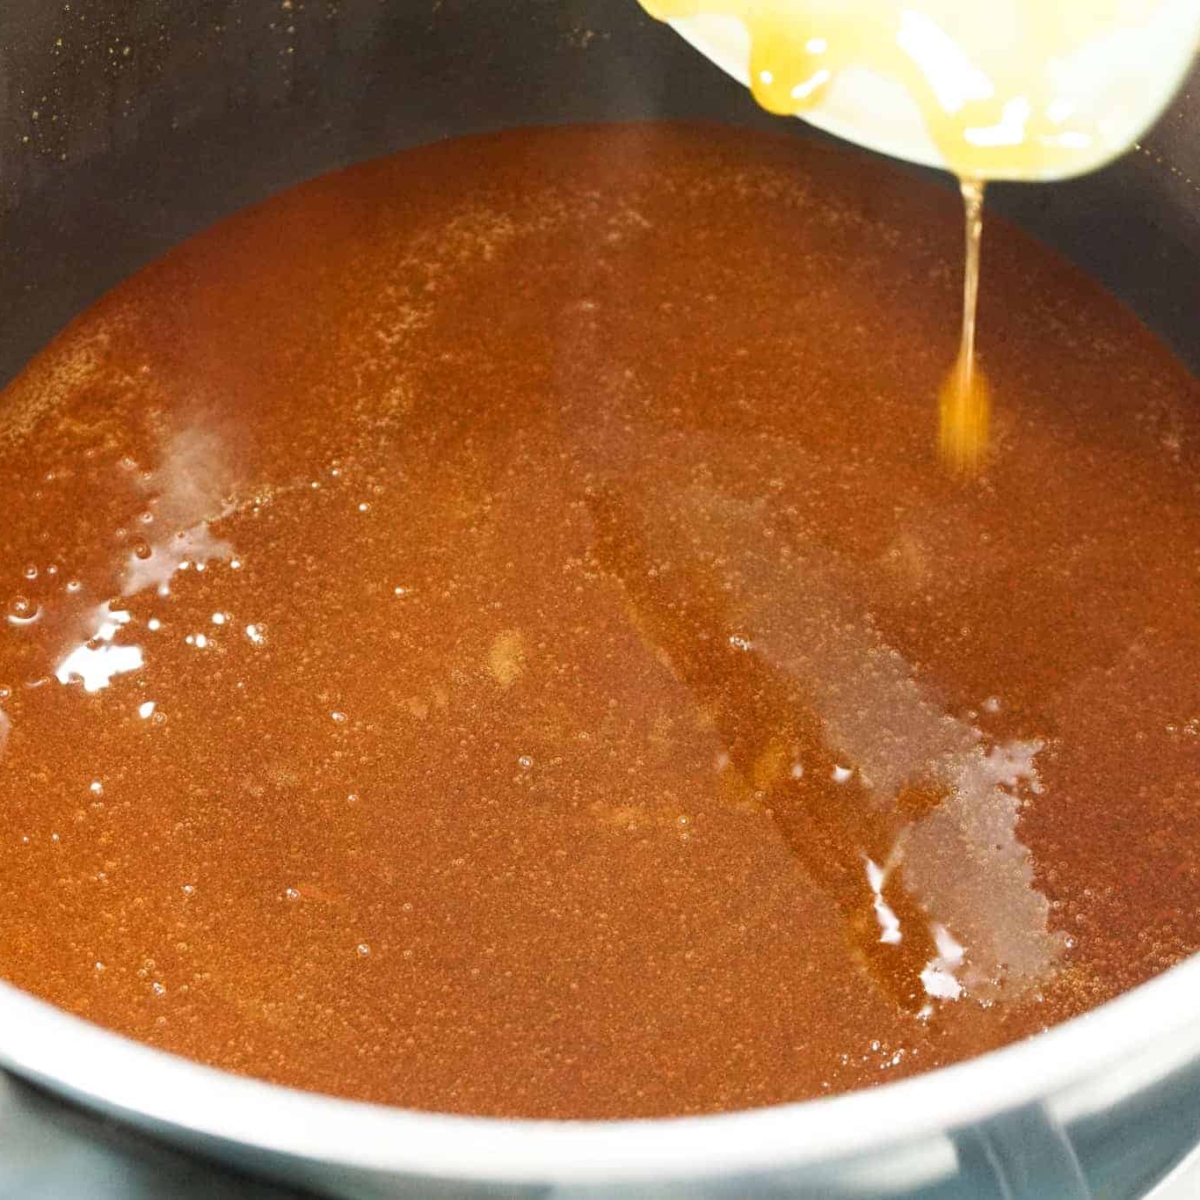
The Sugar Will Begin to Clump and Then Dissolve
You will see clumps of sugar start to form. Keep mixing until all the clumps have dissolved and the sugar looks like caramel (as seen in the pictures below).
Once all the sugar has dissolved into a caramel, it will get darker and darker the longer you leave it on the burner – eventually burning. You don’t want to leave it on the heat long at this point because it will burn very quickly.


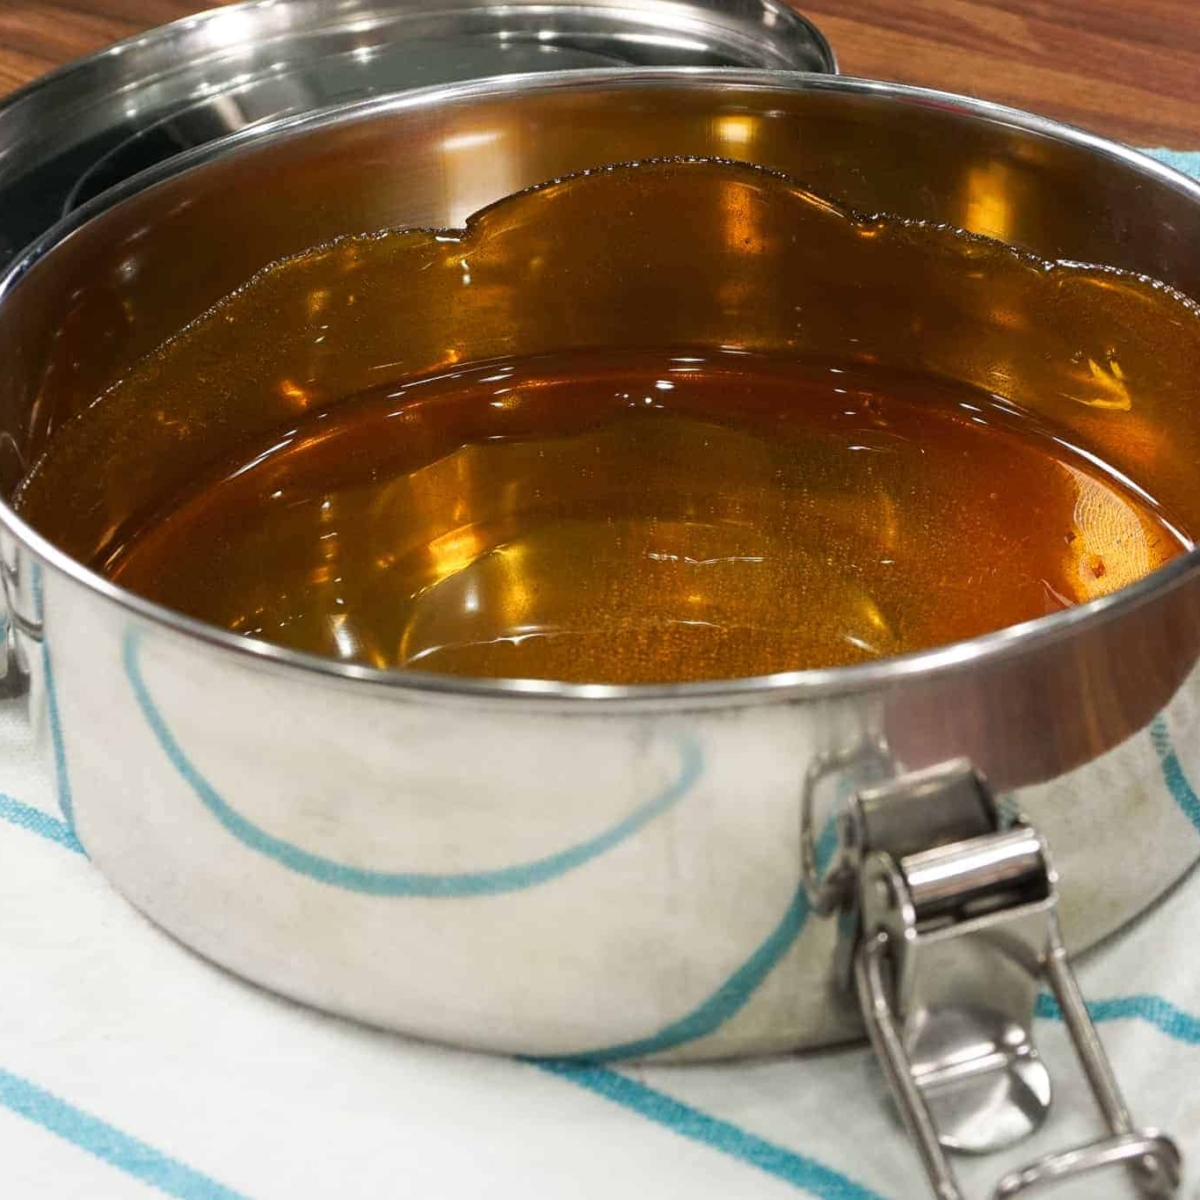
Remove the Caramel from the Heat
Once the caramel has turned a beautiful amber color, remove it from the stove immediately, so it doesn’t burn. Trust me, it happens quickly!
Step 4: Coat the Flan Pan With the Caramel
For this next step, please be very careful. The caramel is EXTREMELY HOT and can cause bad burns if it comes in contact with your skin, so don’t try to taste it by sticking your finger in it!
If you don’t believe me, ask Ryan!
Carefully pour the caramel into your flan pan.
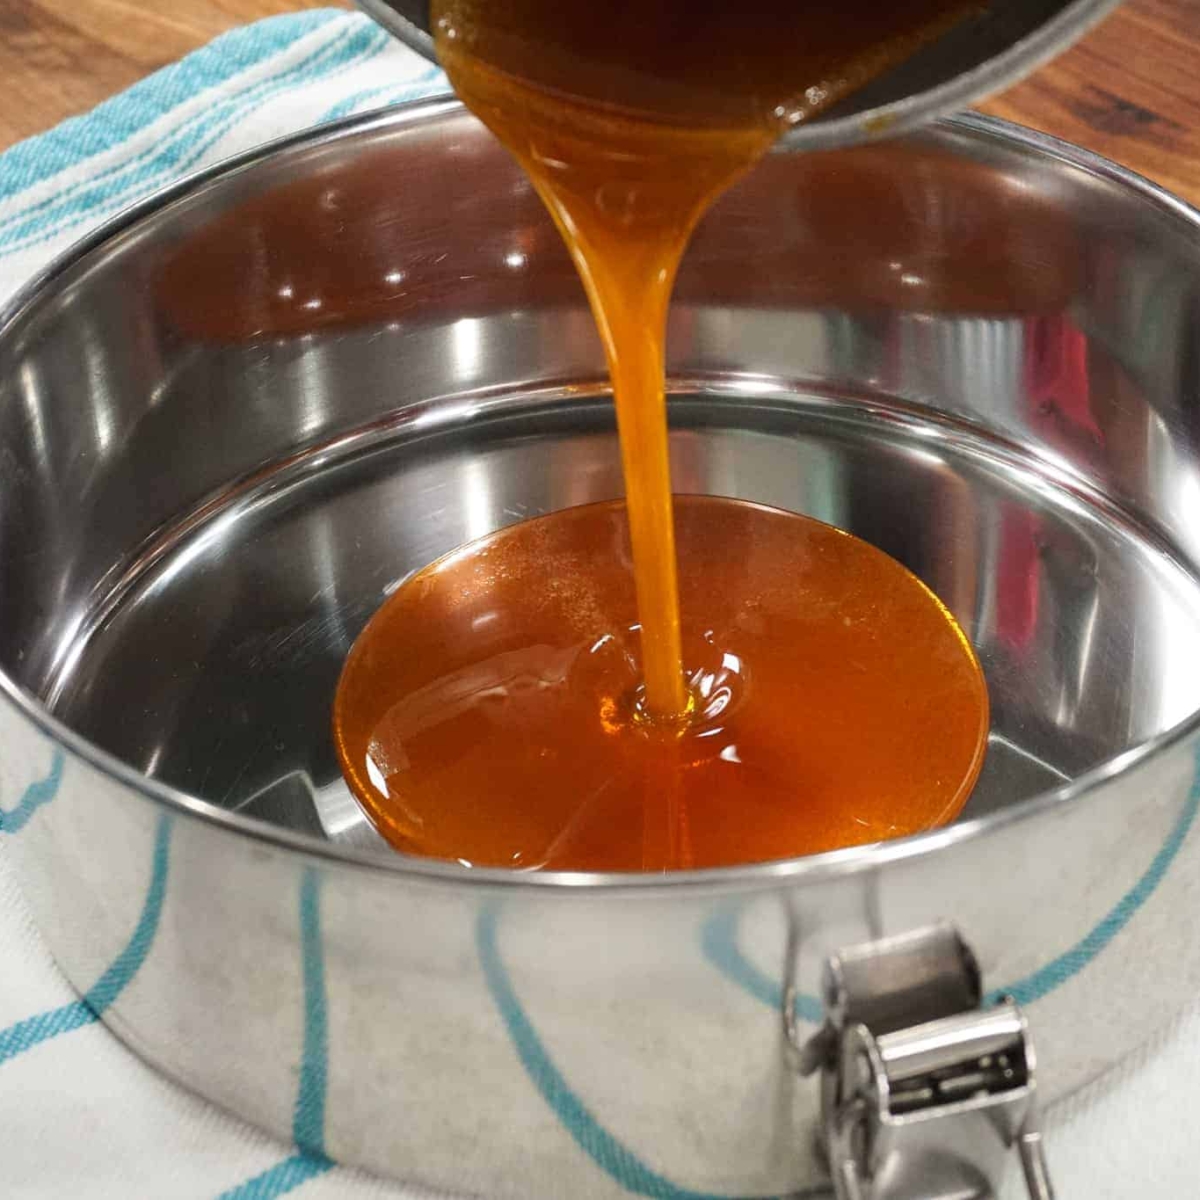
Swirl the caramel around the pan, allowing the caramel to cover the bottom as well as the sides of the pan. Keep swirling the pan around until the caramel no longer moves, and there’s a thin layer of caramel on the bottom and sides.
The pan will get very hot, so I usually use a kitchen towel or some oven mitts when doing this step.
Set the pan aside and let the caramel cool. That was the hard part! From this point on, it’s a breeze.
Step 5: Mix the Flan Ingredients in a Blender
All your ingredients will go into a blender, it couldn’t be easier than that! I usually put my ingredients into the blender in a particular order, but surely you can just throw them all in there and be OK. This is how I do it:
Add the Evaporated Milk
I add the evaporated milk first.

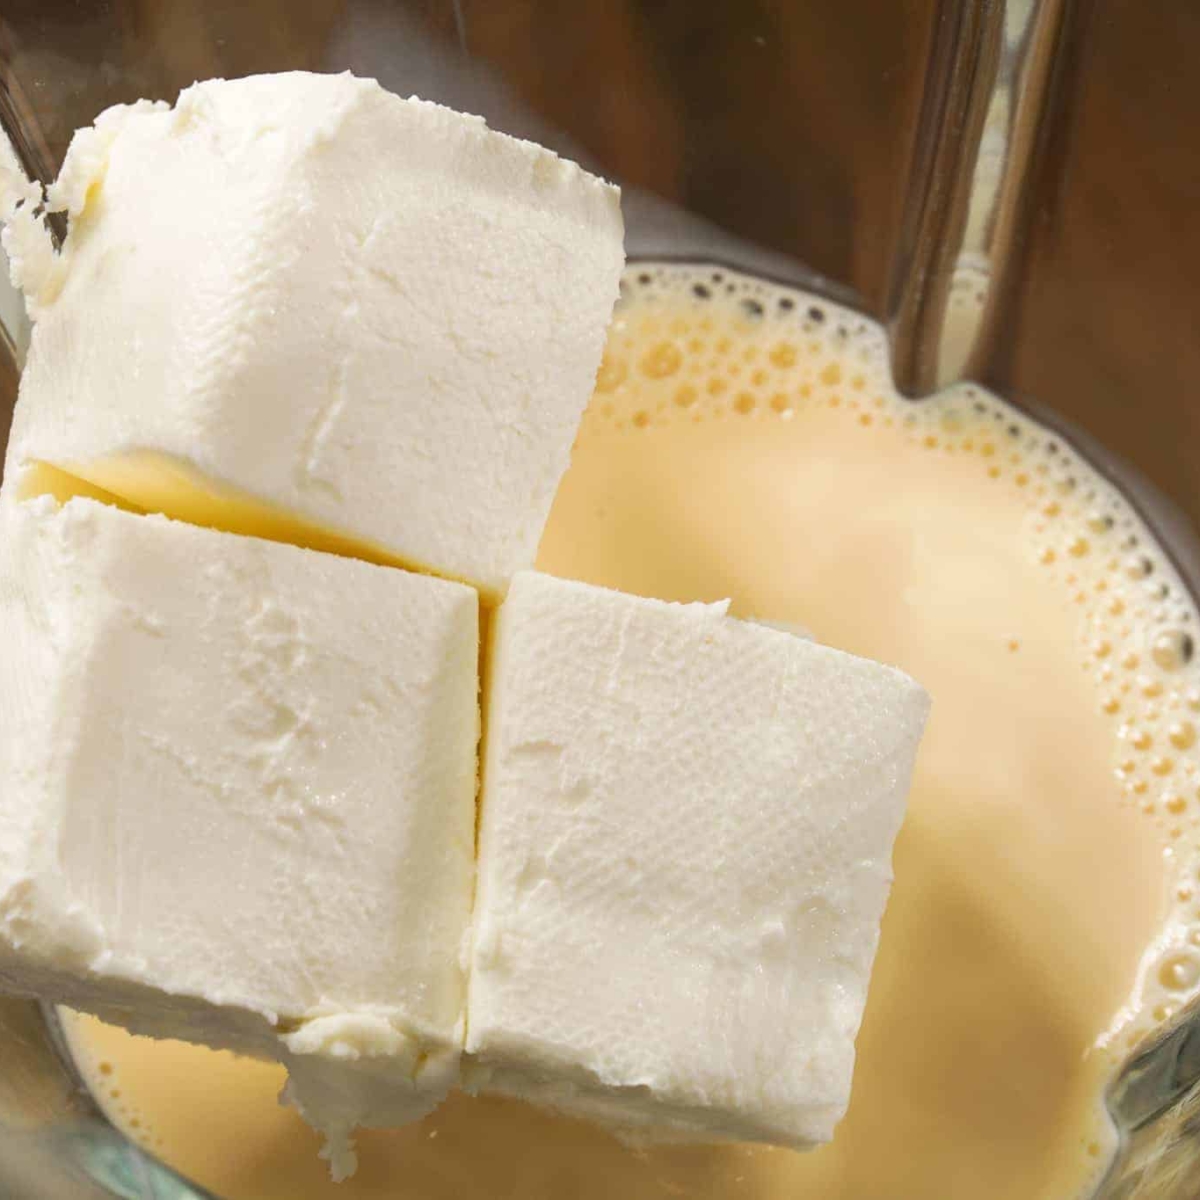
Add the Cream Cheese
The cubed cream cheese is next. I cube the cream cheese, so it ensures everything mixes entirely and there are no huge chunks of cream cheese left over.
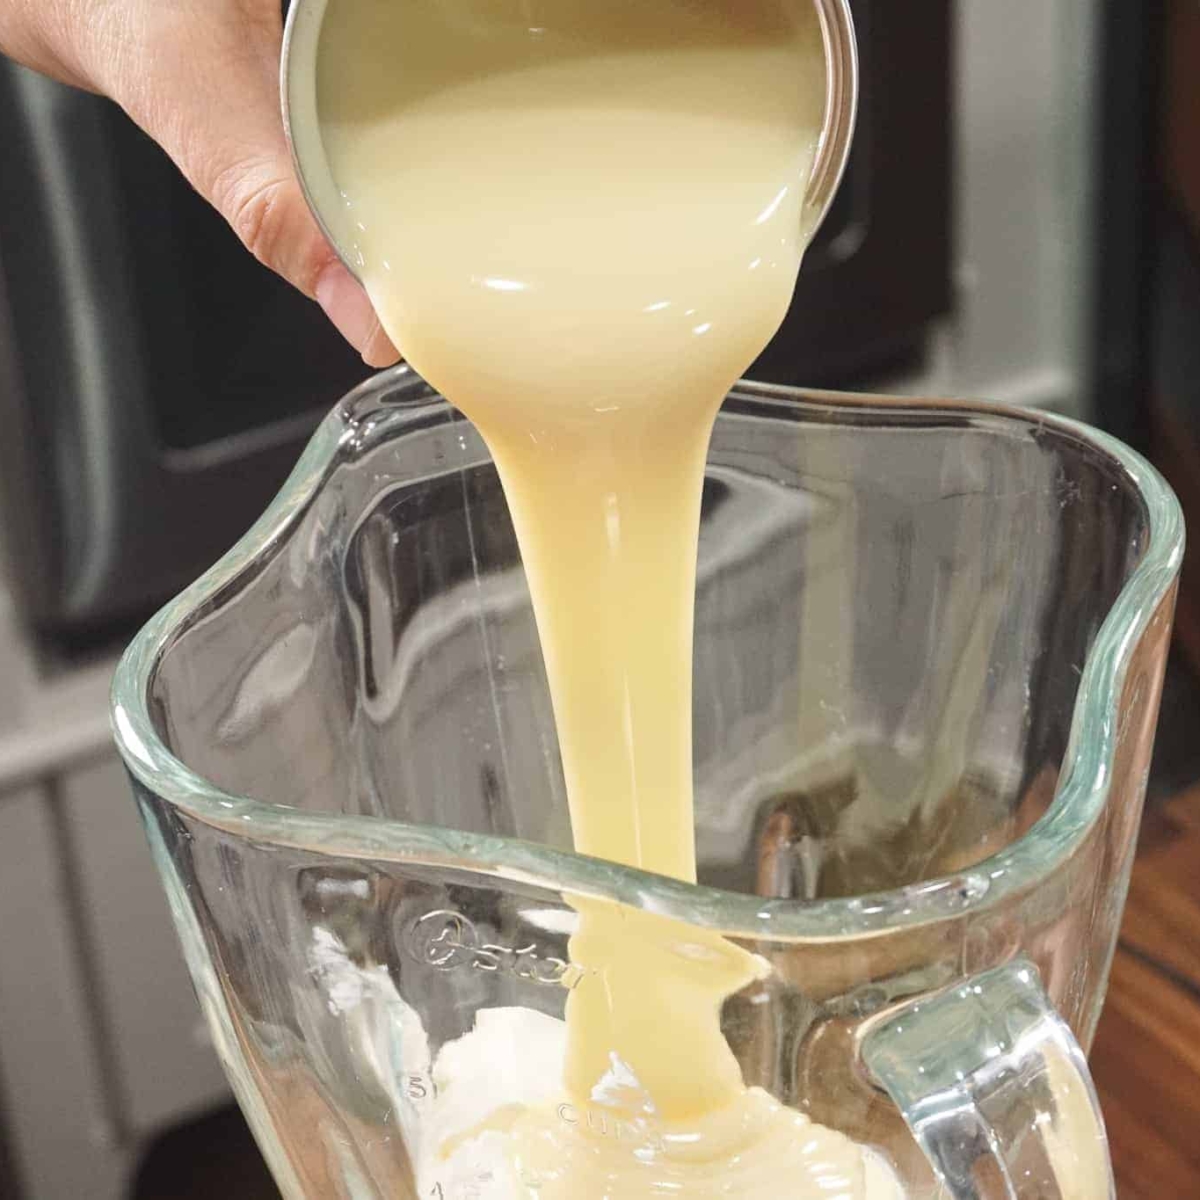
Add the Sweetened Condensed Milk
Next, I pour the sweetened condensed milk in. Since the recipe calls for half a can, I usually just estimate how much I pour in.
Add the Eggs
Finally, I add the eggs.

Blend All the Ingredients
I then blend everything on high speed until all the ingredients are mixed well.

Step 6: Pour the Flan Mixture Into the Flan Pan
Next, you’ll pour the flan mixture into the caramel-coated pan. You may hear cracking from the caramel as you pour, that is OK.


Step 7: Cover the Flan Pan
My flan pan comes with a nifty cover. If you don’t have one, then cover your flan tightly with aluminum foil. The pan also has three latches to keep the lid tightly sealed. I can’t vouch for how long the latches will last since I’ve only had the pan for about a month. But they do look and feel sturdy. If they do break though, I don’t see why I wouldn’t be able to keep using the lid without them. Just a random thought.
I’ve had this flan pan for over a year and have made countless flans in it. I have had no issues with the latches whatsoever. They are sturdy and have held up well to all my flan-making.


Step 8: Place the Pan in the Instant Pot
First, pour the 3 cups of water in the Instant Pot and, using your trivet, carefully lower your flan into the pot. My new flan pan fits perfectly into my 8-quart pot. It’s a 7-inch pan.


Step 9: Close the Instant Pot and Set the Cook Time
Place the lid on your pot and set it on sealing. Cook the flan on Manual High Pressure for 14 minutes. (On some models the “Manual” button is labeled “Pressure Cook”)
Once the flan has finished cooking, allow for a full Natural Pressure Release (NPR), which means you do nothing until the pin drops.

Step 10: Remove the Flan From the Instant Pot
After allowing for a full NPR and your pin has dropped, open your pot and carefully take the flan out. Allow it to cool on the counter for about 20 minutes before placing it in the refrigerator.
The flan pan will be very hot, so I usually set it on a kitchen towel or trivet to cool.

Step 11: Place in the Refrigerator
This step is super important and cannot be skipped. As much as you’ll want to eat the flan now, just don’t!
Once the flan pan has finished cooling on the countertop, place it in the refrigerator for 3 hours or more. My absolute best result was when I made the flan at night and refrigerated it overnight.

Step 12: Time to Open the Pan
Finally, it’s time to enjoy your flan! Uncover it and run a knife around the edge of the pan to separate it.


Step 13: Unmold the Flan
Time to flip it! Placing a plate on top, quickly but carefully turn the pan over to unmold your flan.
Tada!!! Instant Pot Flan perfection!


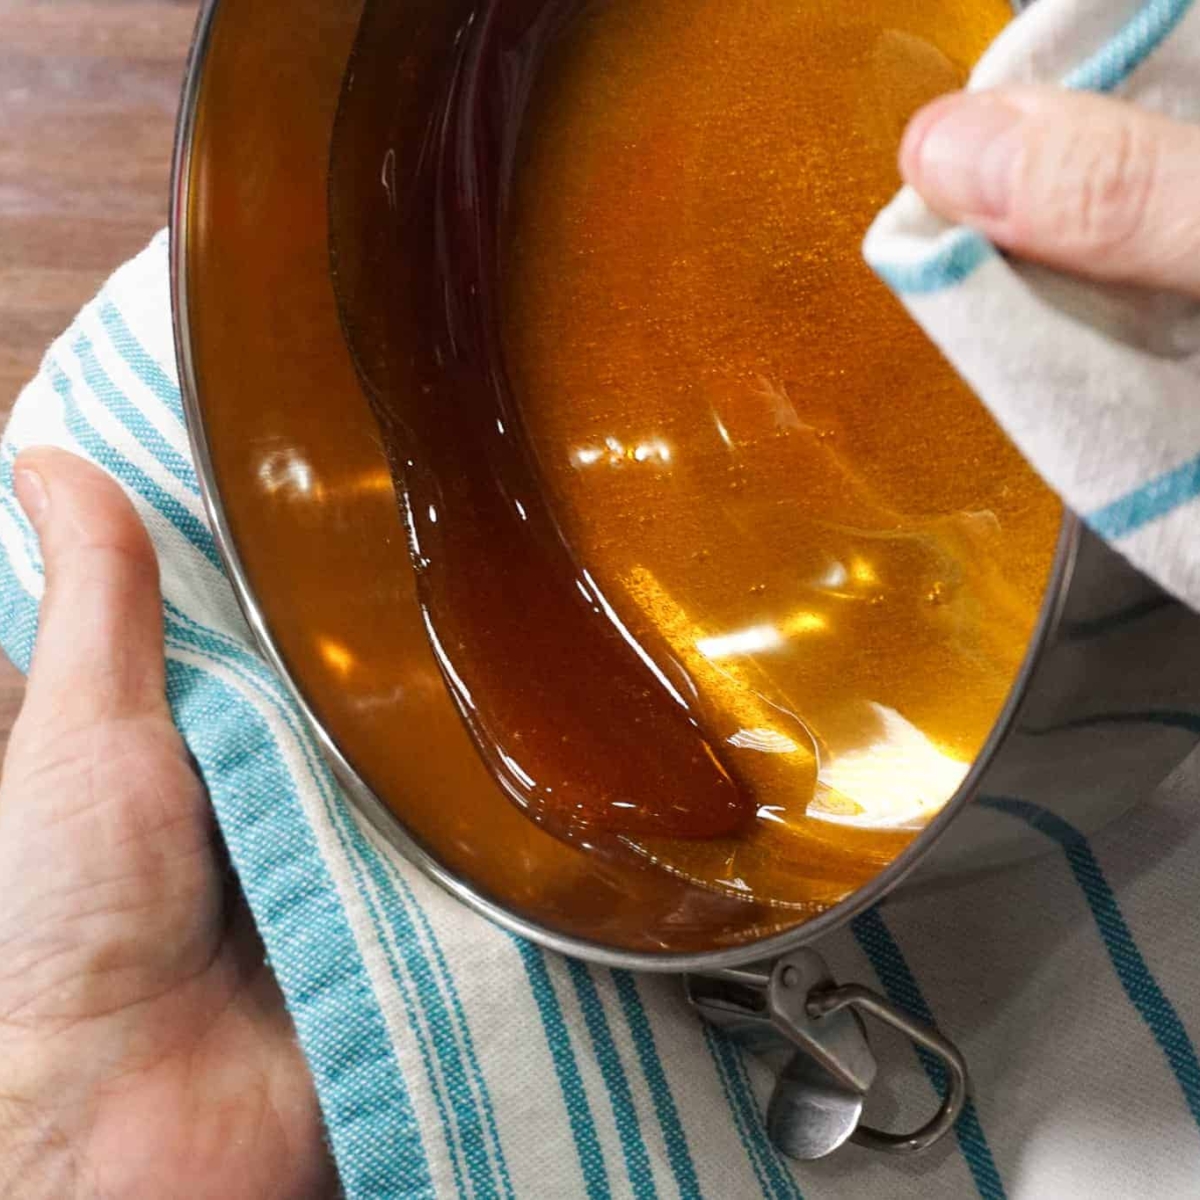
Don’t Waste Any Caramel
I try to scrape as much caramel as I can from the pan, but you should know you will always have some hard caramel left in the pan.

Step 14: Cleaning the Mold
After scraping out as much caramel as possible, you will notice that there is still quite a lot of hard caramel stuck in the pan. This is normal.
The easiest way to clean the pan is to leave it soaking in water for a few hours. The hard caramel will dissolve and then wash right off.
Another good thing to keep in mind, is that the longer you leave the flan in the refrigerator, the more the caramel will liquefy and you’ll have less hard caramel left in the pan when unmolding.

Step 15: Smooth & Creamy Instant Pot Flan
This Instant Pot Flan is so smooth, creamy and delicious! In my opinion, it’s so much easier than making it in the oven.

Step 16: Cut & Serve
Make sure to use a good, sharp knife when cutting the flan, so your pieces come out smooth. Of course, this is if you’re serving it for guests. Or you can do like my kids and husband, and just stick a spoon right in and start eating it! Your choice!
Look at that deliciously delightful slice of flan. Yum!


I always like to scoop out some extra caramel from the bottom and top my piece with it.

Time To Enjoy a Slice of Flan!
Enjoy this delicious Instant Pot Flan! It really is such a fantastic dessert that everyone will absolutely love. Why you try this wonderful Instant Pot recipe, please let me know how much you love it in the comments below!! I’m looking forward to hearing from you.

QUICK & EASY RECIPES
When you sign up to become a newsletter member, you’ll get access to my latest quick & easy homemade recipes, homemaker tips and tricks, free printables, and more delivered directly to your inbox each week.
Instant Pot Flan
A RICH AND CREAMY CUSTARD TOPPED WITH CARAMEL SAUCE
Essential Equipment


Ingredients
for the Flan
- ½ can evaporated milk ½ of a 12 fluid ounce can, 6 fluid ounces
- ½ can sweetened condensed milk ½ of a 14 fluid ounce can, 7 fluid ounces
- 3 eggs
- 4 ounces cream cheese cubed, ½ of an 8-ounce package
for the Caramel
- ½ cup granulated sugar
for the Instant Pot
- 3 cups water
Instructions
make the Caramel
- Caramelize Sugar: Heat the sugar in a skillet over medium-high heat. Stir the sugar constantly. It will first start to clump and once it begins getting hot enough it will start to turn a golden brown and melt into a caramel. Continually stir until all the sugar has been liquefied and there are no more clumps left in the skillet. Do not leave the stove. Your caramel can go from perfect to burnt in the blink of an eye!
- Pour Caramel into Flan Mold: Once all the clumps are gone, immediately pour the caramel into the flan pan. Leaving it on the stove any longer could cause the caramel to burn. When pouring the caramel into the flan pan, make sure that it is spread evenly across the bottom of the entire pan.
- Coat Flan Mold: Very carefully rotate the pan so that the caramel will also cover the sides of the pan as well. The caramel is extremely hot and can cause severe burns if you get it on yourself, so make sure to always handle it very carefully. Keep rotating the caramel until it cools and hardens to the point that it no longer moves around.
- Set Mold Aside: Set the flan pan aside and allow the caramel to cool.
prepare the Flan Mixture
- Blend Ingredients: Add the evaporated milk, cream cheese (I cube the cream cheese), condensed milk and eggs to a blender. Blend on high speed until fully mixed.
- Add to Flan Pan: Pour the flan mixture into the flan pan, over the caramel coating. Place and fasten the cover over the flan pan. If you don’t have a covered flan pan like I do, use foil to cover your flan.
set the Cooking Time
- 14-Minute Cook Time: Pour 3 cups of water into your Instant Pot. Use your trivet and set the covered flan pan in the Instant Pot. Cook on Manual High Pressure for 14 minutes. (The Manual button is labeled Pressure Cook on some models).
- Full NPR: Once the 14-minute cook time has completed, allow for a full NPR (Natural Pressure Release). After the NPR is finished and the pin has dropped, open the Instant Pot and carefully remove the flan pan. Set it on the counter to cool for 10 minutes before placing in the refrigerator. Place in the refrigerator for at least 3 hours. I know it’s hard to wait, but please don’t skip this step. Letting the flan sit in the refrigerator overnight will give the best results.
Unmold and Serve
- Unmold Flan: After the flan has been refrigerated for at least 3 hours (overnight is best), run a knife along the sides of the pan, separating the flan from the edges of the pan. Use a plate to carefully flip the flan over and expose the beautiful caramel covered dessert.
- Serve and enjoy!
Nutrition Facts
Notes
A longer cool time is better. It is perfectly normal for some of the caramel to remain stuck to the bottom of the flan pan. The longer the flan is left in the refrigerator, the less caramel will be left in the pan. To clean any remaining caramel, allow the pan to soak in water until the caramel has fully dissolved.
Common Questions & Answers
How long should I leave the flan in the refrigerator? At a minimum, you should leave the flan in the refrigerator for 3 hours. However, for the very best results, I recommend that you leave it in the refrigerator for 8 hours or more. If you can leave it over night, even better. The longer you leave the flan sitting in the refrigerator, the more the hard caramel topping will dissolve into liquid.
Can I double this recipe? Of course! This recipe doubles perfectly. However, you will need to split the flan mixture between two flan pans. You can even find stackable pans that will allow you to cook both flans at the same time.


I doubled the recipe. Froze the unused half and pulled it out at another time to make a quick easy treat. Second flan as good as the first and I didn’t waste any ingredients. I did wait to make the caramel right before cooking (did not freeze that portion). Yum. Making again today.
Hi Becky! I’m so glad you love my flan recipe! That’s great to know that it freezes well. Thanks for letting me know. I appreciate you stopping by the blog!
So you froze before cooking. Then defrosted, made the Carmel and cooked?
Yes, exactly. It defrosts fairly quickly.
Easy directions. I made it in a cake pan covered with foil. Turned out as described, denser that a traditional flan. A bit more like cheesecake. Tasted good and the caramel was easy to make. I prefer a silkier texture for flan. Thanks for the recipe.
Hi there! Thanks for your comment. Yes, this is a denser flan, since it’s made with cream cheese. I appreciate you commenting with your results. Thanks for stopping by the blog!
If I use a large ramekin to make this flan, do I need to cover it? what do I use to cover?? Does it need to be air tight? How do I adjust the time if the ramekin is only 5 in. around?? Can plastic be used in an instant pot? Sorry…I am sooooooooo new at this Instant pot thing!!
Hi Therese! You can cover anything you use with foil. It doesn’t have to be airtight. If the ramekin is only 5 in around, I’m afraid it may be too small for the mixture. You could make two instead I guess. As for the time, if it’s not in the same size pan I use (or approximately the same) the time will need to be adjusted, but I couldn’t give you an exact number. Maybe take a few minutes off my original time. Plastic cannot be used in the Instant Pot. Hope this helps! Thanks for stopping by!
About How long does it take to cool the caramel once it is in the pan on bottom and sides?
Hi Kelli! It only takes a few minutes before the caramel starts to harden. You can make the caramel first and then when you’re making the flan mixture it’ll be ready for you to pour in. It gets hard really quickly, maybe 5-6 mins. Hope this helps! Enjoy!
Made the Flan last night. I have a 6 qt Duo and used a 7″ pan (not Flan pan). The Flan came out great according to my wife but I expected it to be a little higher. It was only about 1″ high. Will be making this again. Great receipe and easy!!!
Hi Ron! I’m so happy you guys enjoyed the flan! It definitely isn’t as tall, since the pan is small in order to fit in the Instant Pot. I believe in my flan pan it comes out to about an inch as well. Thanks for stopping by!!
Hi. I’m making the flan as I write this… Question. When and where do I add the 1/2 cup of sugar that’s listed in the flan ingredients?
Hi Ken! The sugar is for making the caramel on the stove. It’s the first thing you’ll do, it goes in the pan before the flan mixture.
I’m so happy to see a flan recipe with just sugar for the caramel sauce. When I made my first flan the recipe called for sugar and water. I don’t know what I did wrong but the sugar and water ended up crystallizing and it was just a mess to clean up. I ended up putting the sugar in the pan without water and voila! Caramel sauce success!! I look forward to using your recipe to make IP flan. I’ve never made one with cream cheese.
Hi Jill! I have seen recipes that call for water and I don’t know what the reasoning is. I’ve always made it with just sugar and so did my mom. You will love this flan! It’s rich and creamy! Let me know when you make it! I also have a new chocoflan recipe! It’s amazing!
I made this also! I followed the directions exactly and when I made the carmel and poured it into the pan it turned hard as glass. But I continued and finished making it, hoping that the carmel would soften, it didn’t. When I turned it out onto a plate what I ended up w/ is a very good tasting flan w/ carmel as hard as glass. We eventually had to pick off the carmel so we could it the flan!! 🙁 should I have added water to the sugar????? Or milk?
Hi Therese! It is normal for the caramel to harden entirely when poured into the pan. I talk about that in the post and in the step by step. I also mention that the longer you leave it in the fridge, the more the caramel will turn to liquid. It’s also normal for some caramel to remain in the pan when you turn it over. There’s no need to add water to the sugar when making the caramel. How long did you let it sit in the fridge?
OMG Perfection!!! I am so glad I found this recipe. Your directions were so easy to follow and the end result was exactly what I hoped for. We put in freezer for an hour because we couldn’t wait. I wish I could attach a pic to show how beautiful it looks. Very happy I tried this recipe.
Hi Alexis! I’m so thrilled you loved the flan and my instructions were helpful! I’d love to see a picture on Facebook if you’re a part of the group! I just created two new flans yesterday! I’m super excited about them and hope to have them published both by next week! Stay tuned. Thanks for stopping by and commenting.
Made this 2 nights ago. Used my 8qt pot and 7.5 inch stack pans. Followed recipe exactly. My flan came out maybe 1″ tall. It was not silky not creamy. Tasted good though. Did I do something wrong?? Would have like it to be higher and smoother
Hi Helen! You may have used a larger pan than I do. I believe all of my pans are 7”. This would account for the shorter flan. As far as the creaminess, did you blend it enough in the blender? Those are my initial thoughts for what could’ve gone wrong.
Can you use ramekins or Pyrex bowls for this recipe?
Hi Dirk! You can use ramekins but the cook time may have to be adjusted since the time is based on one larger flan. If you have a round solid bottom pan you can use that as well and cover with foil. Thanks for stopping by!